In this topic
When gathering your source materials, you may want to import:
Word documents (or text files)—these might be interview transcripts, field notes or group discussions
PDF files—these might be published reports, articles, or a collection of scanned documents
When you import Word documents (or text files), the content of the file is imported into NVivo as a 'document' source. You can edit the content of your document sources within NVivo. You can create new (empty) document sources in NVivo and type up your content—for example, you could type up your field notes in NVivo.
When you import PDF files into NVivo, the PDF is imported into your project as a 'PDF' source. You cannot edit the content of PDF sources within NVivo.
NOTE If you are using NVivo 9.0 (rather than NVivo 9.1 or later), PDF files are imported as document sources. NVivo 9.1 changes the way you work with PDF files—refer to What's new in NVivo 9 for more information. If you are still using NVivo 9.0, we recommend you update your software—refer to Software updates for more information.
You store document and PDF sources under the Internals system folder in Navigation View. You can create sub folders under the Internals folder to organise your sources.
Document and PDF sources have different icons, so you can easily identify them:
| Icon | Source |
| Document source | |
| PDF source |
Documents can be moved into the Memos folder—for example, if you import a document that contains your ideas, observations or notes about the progress of the project, you may want to store it as a memo under the Memos system folder. You cannot move PDF sources into the memos folder.
You can double-click a document or PDF source in List View to open it in Detail View.
When you open a document, it opens in read-only mode. You can code, annotate and link the document when it is in read-only mode. If you need to edit the content of the document, click the yellow information bar at the top of Detail View to switch to edit mode.
You cannot edit PDF sources in NVivo, so you cannot switch to edit mode when you are working with a PDF.
To move around a document or PDF you can:
Use scroll bars to move up and down, or left and right
Use 'Go To' to quickly jump to a location. You can go to a specific see also link or annotation, a page (PDFs only), a paragraph (documents only) or character position (documents only)
Find specific words or phrases—refer to Find and replace text
PDF sources can include bookmarks. Bookmarks are displayed in a pane on the left side of Detail View. Click the expand ![]() or collapse
or collapse ![]() button to expand and collapse the bookmark hierarchy. Click on a bookmark to jump to a specific location in the PDF.
button to expand and collapse the bookmark hierarchy. Click on a bookmark to jump to a specific location in the PDF.
As you read through a document or PDF, you can:
Code selected content to thematic nodes or case nodes that represent people, places or other entities
Record your thoughts and ideas by annotating selected content
Make connections to other source materials by adding see also links to selected content
The way you select content to code, annotate and link varies slightly between document and PDF sources—refer to Select content in documents and Select content in PDFs for more information.
You can also edit the content of documents—refer to Create and edit documents for more information. PDF sources cannot be edited.
NOTE If you have a collection of structured document sources, you can use automatic coding techniques to speed up coding. For example, if you are working with a collection of interview transcripts, you can automatically code the contents based on heading styles or paragraph number—refer to Automatic coding in document sources for more information.
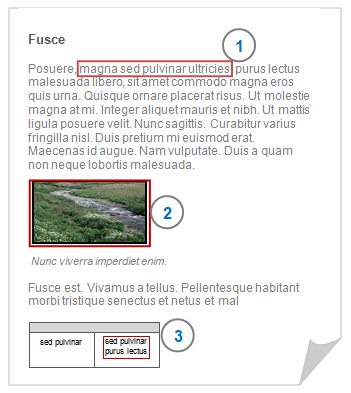
When you are working in a document, you can select text or images:

1 You can select portions of text—click and drag with the mouse to select text the text you want to code, link or annotate. You can also double-click to select a word and triple-click to select a paragraph.
2 You can select entire images—you cannot select regions of the image.
3 If your document contains a text table, then you can select images or text contained within the table.
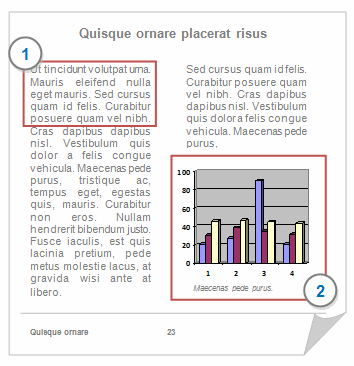
When you are working in a PDF, you can select text or regions of a page:

1 Select portions of text. By default, PDFs open in text selection mode—you can click and drag to select the text you want to code, link or annotate. You can also double-click to select a word and triple-click to select a line.
2 Select regions of a page. If you switch to region selection, you can click on an image to select it, or click and drag to select a rectangular region of the page. When you select a region, you are making a image selection, even if the region you select contains text.
To switch between text and region selection—on the Home tab, in the Editing group, under PDF Selection, click Text or Region.
NOTE
PDFs that are created by scanning paper documents may contain only images—each page is a single image. if you import the PDF into NVivo, you will find that there is no text in the page to select, code or query. You can select and code regions of the page, however you are coding a image selection and you cannot use Text Search or Word Frequency queries to explore the text. If you prefer to work with text (rather than images of text), then you should consider using optical character recognition (OCR) to convert the scanned images to text (before you import the PDF files into NVivo).
NVivo tries to determine the order of text on a PDF page, however when you select text, you may find that the text on the page is not sequenced as you expect.
In earlier versions of NVivo (NVivo 8 and 9.0), PDF files were imported as document sources. When you convert your project to NVivo 9.1 (or later) format, these documents are not converted into PDFs—all document sources (including documents created by importing PDF files) remain document sources in the converted project.
If you want to work with these sources as PDFs, then you must re-import the PDF files into your project.
NOTE NVivo 9.1 changes the way you work with PDF files—refer to What's new in NVivo 9 for more information. If you are still using NVivo 9.0, we recommend you update your software—refer to Software updates for more information.