What do you want to do?
On the View tab, in the Workspace group, select or clear the Navigation View check box.

Click Configure buttons ![]() at the bottom of Navigation View.
at the bottom of Navigation View.
Select the required display settings.
NOTE When buttons in Navigation View are hidden, you can navigate to project items using the Go commands—refer to Accessibility for more information.
You can show, hide or re-order columns in List View to customize the way information is displayed.
Click in List View.
On the View tab, in the List View group, click List View, and then click Customize.

The Customize Current View dialog box opens.
To show a column in List View:
In the Available columns box, select a column.
Click the right arrow >>
To hide a column from List View:
In the Selected columns box, select a column.
Click the left arrow <<
To re-order columns in List View:
In the Selected columns box, select a column.
Click the up arrow ![]() to move left, or the down arrow
to move left, or the down arrow ![]() to move right.
to move right.
Click OK.
NOTE Click Reset to restore the default List View columns.
You can sort the items displayed in List View, by clicking the header of the column you want to sort by—for example, to sort items by their creation date, click the Created on column header.
You can also sort items by using commands on the ribbon:
Click in the List View.
On the Layout tab, in the Sort & Filter group, click Sort By, and then click the column you want to sort by.

NOTE
When you first sort by the column, the items are ordered in ascending order (for example, A-Z). If you sort the column again, the order is reversed (Z-A).
When you work with nodes and the members of sets in List View, you can set your own custom order. Refer to Reorder and refine nodes or Create and manage sets for more information.
Click in List View.
On the View tab, in the List View group, click List View, and then click Reset All Customizations.

You can view sources as thumbnail pictures in List View—this is most useful when you are working with pictures and videos.
To display thumbnails:
Select the required source folder.
Click in List View.
On the View tab, in the List View group, click List View, and then select Small, Medium or Large Thumbnails.

NOTE For video sources, you can assign a specific video frame as the thumbnail. This is useful when the first frame is black or does not typify the content. Refer to Customize the audio or video display (Select a video frame for thumbnail view) for more information.
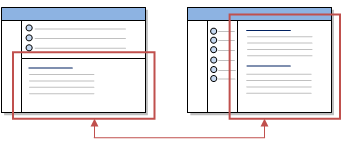
You can arrange your NVivo workspace to display Detail View on the right side of the window. This can be useful when you are coding sources using drag and drop, or when you are exploring coding stripes in a node.

On the View tab, in the Workspace Group, click Detail View, and then click Right.

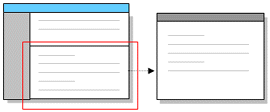
You can undock Detail View to work with project items in a separate window:

Open a project item.
On the View tab, in the Window group, clear the Docked check box.

NOTE To undock all items open in Detail view, click Undock All in the Workspace group on the View tab.
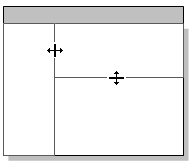
To increase or decrease the size of List View or Detail View:
|
Click and drag the splitter bars. |
 |
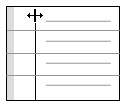
To adjust the width of the columns in List View or Detail View:
|
Click and drag the column borders. |
 |
On the View tab, in the Workspace group, select or clear the Find check box.

By default, the Quick Coding bar is displayed at the bottom of Detail View when you open a source or node. You can undock the Quick Coding bar so that it floats over the workspace—then you can move it to any location in the NVivo window.
To show, hide or move the Quick Coding bar:
On the View tab, in the Workspace group, click Quick Coding, and then click Hide, Docked or Floating.

NOTE You can quickly hide the Quick Coding bar, by clicking Hide in Quick Coding bar.