The Report Criteria dialog allows you to filter, sort or group data in a report that you are creating or editing using the Report Designer.
Options on this dialog
You can set up a filter to limit the number of records displayed in the report when it is run. You can filter on a:
User-entered value. This will prompt the user to enter a value for the filter when they run the report—for example, if you want to create separate reports to summarize each project member's coding.
Pre-defined value—for example, source type equals picture—if you always want to run the report using the same filter.

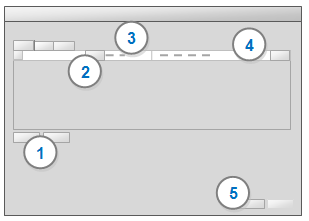
1 Click the Add button to add a filter. You can add more than one filter.
2 Click Select and choose the field that you want to filter.
You can choose a field that will display in your report or you can choose a different field. For example, for a report that includes source name and thumbnail you could add a filter for source type equals picture.
3 Select a filter type from the list—for example, Equal to, Contains, or Is empty. The available options depend on the field type—for example, if you are filtering on a date, you can select Last month.
NOTE
Choose the filter type In if you want to specify more than one criteria—for example if you want to report on the nodes water quality, habitat, and environmental impacts.
If you are creating a filter based on a user-entered value, the user will be able to choose a filter type when they run the report.
If you add more than one filter, all filters are applied—for example, source type equals picture AND coding node name equals water quality.
4 Enter the criteria or click Select to choose a specific item. If you are creating a filter on a user-entered value, select [prompt for parameter].
For some combinations of fields and filters, the Select button is not available—for example, if you choose Contains then you need to enter a text string.
5 Click OK.
You can specify grouping levels for your report. Information is often easier to understand when it is organized into groups. For example, you could specify grouping by source type. All audio sources would be listed in one group, all document sources in another group, and so on.
The items that belong to a group are automatically sorted in ascending order. For example if you group by type, all the Audio sources would display first, followed by Document sources, followed by External sources and so on.

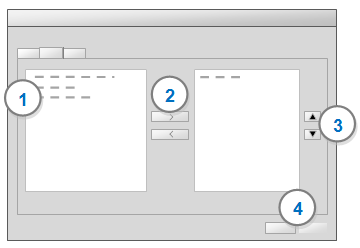
1 Select a field from the list of Available fields.
2 Click > to move the field to the Selected fields list. All fields displayed in this list will be used to define groups as illustrated below.
3 If you have selected more than one field to group by, you can change the order of the grouping. Click a field in the Selected fields list and then click ![]() to move up or
to move up or ![]() to move down.
to move down.
4 Click OK.
You can create nested groups by selecting more than one field. The order of the selected fields determines the order of the nested groups.
Example 1
Grouping order:
Item Type
Created by
| Item Type | Created by | Item Name |
|
Audio |
User 1 |
Audio 1 |
|
|
Audio 2 |
|
|
|
User 2 |
Audio 3 |
|
|
Audio 4 |
|
|
Document |
User 1 |
Document 1 |
|
|
|
Document 2 |
|
|
User 2 |
Document 3 |
|
|
|
Document 4 |
Example 2
Grouping order:
Created by
Item Type
| Created by | Item Type | Item Name |
|
User 1 |
Audio |
Audio 1 |
|
|
Audio 2 |
|
|
|
Document |
Document 1 |
|
|
Document 2 |
|
|
User 2 |
Audio |
Audio 3 |
|
|
|
Audio 4 |
|
|
Document |
Document 3 |
|
|
|
Document 4 |
You can specify up to four levels of sorting for the data in your report.

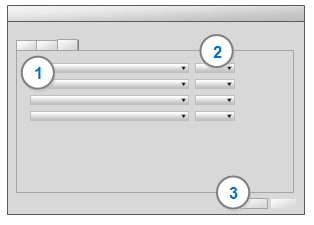
1 Select a field that you want to sort on.
2 Select either Ascending or Descending.
3 Click OK.
The following shows sorting by more than one level. In this example, the report is sorted by Created by, then by Item Type, then by Item Name.
| Created by | Item Type | Item Name |
|
User 1 |
Audio |
Audio 1 |
|
User 1 |
Audio |
Audio 2 |
|
User 1 |
Document |
Document 1 |
| User 1 |
Document |
Document 2 |
|
User 2 |
Audio |
Audio 3 |
|
User 2 |
Audio |
Audio 4 |
|
User 2 |
Document |
Document 3 |
|
User 2 |
Document |
Document 4 |