What do you want to do?
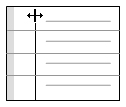
To adjust the width of a single column:
Drag the boundary on the right side of the column heading until the column is the width that you want.

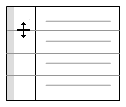
To adjust the height of a single row:
Drag the boundary on the bottom of the row heading until the row is the height that you want.

To adjust the width or height of multiple columns or rows:
Select the columns or rows you want to adjust. To select multiple columns or rows, select the first one, and then hold down the CTRL key while you select the others.
On the Layout tab, in the Rows and columns group, click ![]() Size, and then click Column Width or Row Height.
Size, and then click Column Width or Row Height.
The Column Width or Row Height dialog box opens.
Enter your preferred width or height (in pixels).
Click OK.
To adjust row height to automatically fit the contents of the cells:
Select the rows you want to adjust. To select multiple rows, select the first one, and then hold down the CTRL key while you select the others.
On the Layout tab, in the Rows and columns group, click ![]() Size, and then click AutoFit Row Height.
Size, and then click AutoFit Row Height.
Click OK.
To move a column left or right:
Select the column you want to move.
You can also reorder columns using the Framework Matrix Properties dialog box.
Select the framework matrix in List View.
On the Home tab, in the Item group, click the Properties image.

The Framework Matrix Properties dialog box opens.
Click the Columns tab.
Use the up and down arrows to reorder the column (theme) nodes.
Click OK.
If you want more space to review the matrix you can undock the Detail View. The framework matrix opens in a separate window and the associated view is closed.
To undock the framework matrix visible in Detail View:
On the View tab, in the Window group, clear the Docked check box.

NOTE If you want to work with the associated view, you will need to keep the framework matrix docked. To dock a floating window, select the Docked check box, in the Window group, on the View tab (in the floating window).
On the View tab, in the Detail group, click Framework Matrix, and then, under Associated View Display, click Right, Bottom or Hide.

When you enter text into a framework matrix, the default font, point size and color is determined by settings in your project properties. You can change these settings—for example, you might prefer a smaller point size—the default settings apply to any new summaries you create within framework matrices in your project (existing summaries are not changed).
To change the default text style for framework matrices:
The Project Properties dialog box opens.
NOTE If you want to change the formatting of a portion of text in a summary, you can use the commands in the Format group on the Home tab to apply color, bold, italics and other formatting. For example, you might want to use green italics to indicate verbatim text in the summary.
To return the framework matrix back to its original display settings (for example, the default row height, column width and column order):
On the Layout tab in the Tools group, click Reset Settings.
