Relationships record statements or hunches you have developed about how items in your project are linked—for example, Anna 'employes' Ken or industrial waste 'impacts' water quality. You can create relationships in your project and then gather evidence about the relationship from your source material.
What do you want to do?
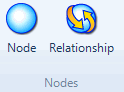
On the Create tab, in the Nodes group, click Relationship.
The New Relationship dialog box opens.
Click the Select buttons beside the From and To boxes to choose the items involved in the relationship. The Select Project Item dialog box opens.
On the left, click the folder name that contains the project item that you want.
On the right, select the project item that you want to include in the relationship. You can click the Filter button to display only items that match specified criteria.
Click OK.
Click the Select button beside the Type box, then select a relationship type and click OK—refer to Create and manage relationship types for more information on relationship types.
Click OK.
NOTE
Relationships must be unique—for example, you cannot have two instances of the relationship, Anna 'employs' Ken.
You can also assign a color to a relationship—refer to Assign color to nodes for more information.
You can convert a relationship to an ordinary node. The coding at the original relationship is retained in the new node.
In Navigation View, click the Nodes button, and then click the Relationships folder.
In List View, click the relationship you want to convert to a node.
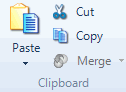
On the Home tab, in the Clipboard group, click Copy.
Keyboard shortcut To copy, press CTRL+C.
In Navigation View, click the destination node folder.
On the Home tab, in the Clipboard group, click the Paste image.
Click Yes to confirm.
NOTE
Using Copy retains the original relationship in the Relationship folder. If you wish to remove the relationship as part of the conversion, use Cut instead of Copy.
Once you have converted a relationship into a node, the link between the two project items is removed. Any models that include the relationship as part of a linked project item may be affected. Refer to About models for more information.
As your project evolves, you may find that you have two relationships with similar meaning—for example industrial waste 'causes' water pollution and industrial waste 'impacts' water quality. You can simplify your project by merging one relationship into the other.
In Navigation View, click the Nodes button, and then click the Relationships folder.
In List View, select the relationship you want to merge into another relationship.
On the Home tab, in the Clipboard group, click Copy.
Keyboard shortcut To copy, press CTRL+C.
In List View, click the target relationship.
On the Home tab, in the Clipboard group, click Merge, then click Merge into Selected Node. The Merge Into Node dialog box opens.
Click OK.
NOTE
As a result of the merge, the target relationship is updated to include content coded at the merged relationship. Any 'see also' links or annotations from the merged relationship are now available in the target relationship.
Using Copy retains the original relationship in the Relationship folder. If you wish to remove the relationship as part of the merge, use Cut instead of Copy.
In Navigation View, click the Nodes button, and then click the Relationships folder.
In List View, click the relationship you want to delete.
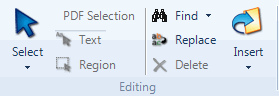
On the Home tab, in the Editing group, click Delete.
The Delete Confirmation dialog box opens.
Click Yes to confirm.
NOTE
If you delete a relationship, any coding at the relationship is also removed from the project.
If you delete one side of a relationship, the entire relationship is deleted.
In Navigation View, click the Nodes button, and then click the Relationships folder.
In List View, click the relationship you want to change.
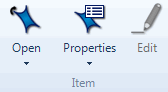
On the Home tab, in the Item group, click the Properties image.
The Relationship Properties dialog box opens.
Click the Select buttons beside the From and To boxes to choose the items involved in the relationship. The Select Project Item dialog box opens.
On the left, click the folder name that contains the project item that you want.
On the right, select the project item that you want to include in the relationship. You can click the Filter button to display only items that match specified criteria.
Click OK.
Click OK.
In Navigation View, click the Nodes button, and then click the Relationships folder.
In List View, click the relationship you want to change.
On the Home tab, in the Item group, click the Properties image.
The Relationship Properties dialog box open.
Click the Select button beside the Type box, then select a relationship type and click OK.
Click OK.
You can open the individual project items that are linked in a relationship to view the coding.
In Navigation View, click the Nodes button, and then click the Relationships folder.
In List View, click the relationship you want to explore.
Right-click to see the shortcut menu, and then click Open From Item or Open To Item. The selected item opens in Detail View.
You can create a chart to visually represent the sources and attributes coded at a relationship.
In Navigation View, click the Nodes button, and then click the Relationships folder.
In List View, click the relationship that you want to explore as a chart.
On the Explore tab, in the Visualizations group, click the arrow below Chart, and then click Chart Relationship Coding.
The chart opens in Detail View.
NOTE You can also create a chart that displays the relationship coding by attribute by selecting Chart Relationship Coding by Attribute Value on the Chart button, in the Visualizations group, on the Explore tab.
In Navigation View, click the Nodes button, and then click the Relationships folder.
In List View, click the relationship you want to export.
On the External Data tab in the Export group, click Export and then click Export Relationship.

The Export Options dialog box opens.
Select the required options—for more information refer to Export Options.
Click OK. The Save As dialog box opens.
The exported file is saved to your default location for exported files, you can choose a different location if necessary.
In the File name box, review the name that NVivo proposes for the exported file, and change it if necessary.
In the Save as type box, choose the file format for the exported file.
Click Save.