When working with a model in Detail View you can format shapes and connectors.
You can define:
The font used for text inside shapes and beside connectors
The fill color in a shape
The line weight and color of a connector or shape border
What do you want to do?
Make sure you are in edit mode.
Select the shape or connector.
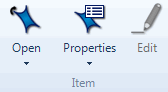
On the Home tab, in the Item group, click the Properties image.
The Shape Properties or Connector Properties dialog box opens.
In the Name box, edit the text to be displayed on a shape or connector.
Click OK.
Make sure you are in edit mode.
Select the shape or connector.
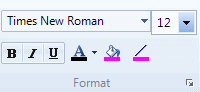
On the Home tab, in the Format group, select the font, point size, style or color that you want to apply.
NOTE You can also define a model style with specific font, line, or fill that you can apply to the models in your project.
Make sure you are in edit mode.
Click the required shape or connector. Handles are displayed when the shape is selected.
Click and drag a handle to resize.
Make sure you are in edit mode.
Select the required shape.
On the Home tab, in the Format group, click Fill.
The Fill dialog box opens.
Click Color and select the required color from the Color list.
Click OK.
NOTE You can also define a model style with specific text styling, line, or fill that you can apply to the models in your project.
Make sure you are in edit mode.
Select the required shape.
On the Home tab, in the Format group, click Fill.
The Fill dialog box opens.
Click Image. The Select Fill Image dialog opens.
Select the image you want to display on the shape, and then click Open.
Click OK.
If you have assigned colors to sources, nodes, relationships, or attribute values that are in your model, you can display the item color indicator on the model shapes. Items with no color have no color indicator.

To display item color indicator on model shapes:
On the View tab, in the Visualization group, click Color Scheme, and then click Item Colors.

NOTE You can also set the application options to display assigned colors by default when you create a model—refer to Set application options (Display tab options) for more information.
Make sure you are in edit mode.
Select the required shape or connector.
On the Home tab, in the Format group, click Line.
.
The Line dialog box opens.
Select the line style, weight and color that you want to apply.
Click OK.
NOTE You can also define a model style with specific text styling, line, or fill that you can apply to new models.
You can create and apply custom model styles to differentiate elements in your model. For example, you could create a model style for nodes representing negative attitudes, and another style for nodes representing positive attitudes. Then you can apply these styles to shapes in your model to visually emphasize the different attitudes of your survey participants.
Model styles include definitions for text and line styling for shapes and connectors, and the fill color of shapes.
To create a new model style:
Click the File tab, point to Info, and then click Project Properties.
The Project Properties dialog box opens.
Click the Model Styles tab.
Click the New Style button. 'New style' is added to the list of styles and you can define its name, text styling, line, or fill.
NOTE
You can also define model styles for all new projects refer to Set application options for more information.
If you change a model style, existing models in your project that use they style are not automatically updated. If you want to apply the changed styling to existing models, you must reapply the style to the model shapes.
Make sure you are in edit mode.
Select the required shape or connector.
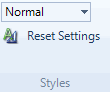
On the Home tab, in the Styles group, select a style from the Style list.
 .
.